Summary
Description
If multiple people use Sage 50 Accounts, set up individual logins to track activity and control access to different areas.
On multi-user versions, set up individual users so more than one can process in a company at once.
Using Sage 50 Accounts v26 or below? refer to our article for earlier versions.
 NOTE: Your licence determines how many people can log on at once. To check how many users you have a licence for, click Help, click About, then under Licence Information look for Users. To add more users to your licence, just leave your details and we'll get in touch.
Resolution
Create a new user
- Log into Sage 50 Accounts as the Logon name MANAGER.

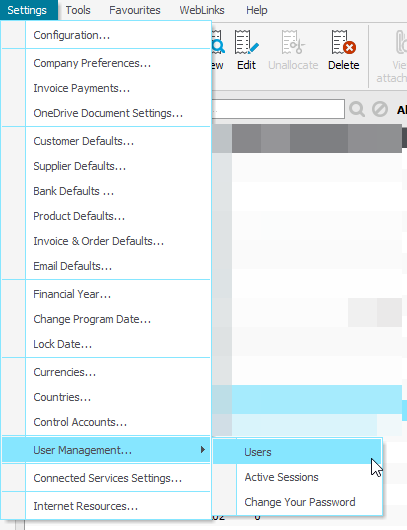
- Click Settings then click User Management and click Users.

- Click New then click the required user type then click Continue.
- In the User Profile window, enter the following information:
Create a user name
Each person using the software must have a user name. The name can use upper or lower case characters, spaces or numbers.
Password not required
Select this option if you don't want this user to have a password. The option is only available to a standard user type.
Require password change at next login
Select this option if you want the user to change their password next time they logon to this company.
Create Password / Confirm Password
Adding a password to a username is optional but does provide extra security.
- Select the areas in the software you want the user to have access.
To do this, select the boxes for the required areas. To grant access to all areas, click Select All. NOTE: For administrators, this window doesn't appear as they have full access by default.
 - Once complete, click Continue.
- If you use Remote Data Access, click Allow Remote Data Access then fill in the User details.
- Check the User Summary then click Save and click Close.
Upgrade your licence
Growing business? Add more companies, users, or employees to your licence with ease. Leave your details and we’ll be in touch.

