Customising sales documents
Summary
Description
Give your invoices a professional look in keeping with your brand. Make changes from the Settings or when creating a sales invoice.
Resolution
How this works
Make the required changes when creating a sales invoice or update the Settings directly. Preview any changes as you go.
Changes you make will only apply to new documents. Existing documents are only updated if you edit them.
- Add your business logo to documents such as sales invoices to promote your business brand.
- Change the layout by choosing one of our templates
- Change the font and the colours used on headings to match your brand
- Change the labels on your line items, such as the Price or Rate
- Set up the numbering system you want to use
- Choose what contact details to show
- Add your bank details so customers know how to pay you
- Add other information as notes such as opening hours, website address or useful seasonal information
- Include terms and conditions such as when payment is due
- Tell your customers about your qualifications and the trade associations you belong to by adding additional logos
- Add more details in the footer
Upload your business logo
Logos must meet certain requirements to make sure they don't appear stretched, blurry, or pixelated on your invoice:
- The file format must be a JPG, PNG or GIF
- Business logos should be a maximum of 280 pixels wide by 200 pixels high
- Association logos should be a maximum of 180 pixels wide by 200 pixels high
Once uploaded, reposition the image as needed within the preview area. Use the Plus and Minus buttons to zoom in or out on the image or Reset the image to start over.
- Select More, then Business Settings, Templates and Logos.
- Select Add a logo
- Browse to the image file you want to use or drag and drop it on Add a logo.
Change the template
We provide a selection of templates to suit both service and product-based businesses.
- Select More, then Business Settings, Templates and Logos.
- Select the template that best suits your business.
- To see what an invoice will look like, choose Preview.
- To keep your changes, choose Save.
Add footers, notes, and terms and conditions
Select More, then Business Settings, Document preferences.
Use the Footer Details or Notes to tell your customers more about your business, such as opening hours, website address or useful seasonal information Add your bank details so customers know how to pay you.
Include your standard terms and conditions so your customers know when payment is due.
You can change Notes and Terms and conditions on individual documents.
Set your numbering system
Select More, then Business Settings, Document preferences.
Set up the numbering system to suit your business. Change the starting number or the prefix as required.
When you first start using Accounting, your document numbers start from 1.
We also add a prefix so you can distinguish each type of sales document; invoice, credit note, quote etc.
When you save a sales document, we assign it a unique number.
For quotes and estimates, you can re-use a number once you delete a quote or estimate.
For invoices and credit notes, you cannot change or re-use a number once it is assigned. The number remains assigned even if you delete (void) the invoice or credit note. This is to make sure you have a full audit of all your invoices and credit notes. However, you can reuse the same prefix and reference on another invoice.
Set email defaults
Select More, then Business Settings, Document Emails.
From here, set the default text for your email message when you email an invoice, statement or other document. This standard text is pre-populated when you choose to email your document. Change it for individual documents or customers as required.
Changes the reply address for any emails you send, and choose whether you want to receive a copy.
Choose whether to attach a PDF version of your sales document as well. All emails contain a link to an online version of your document.
Preview an invoice
Select Preview on the Templates and Logos page or the Document Preferences page to see the effects of your changes. This will open a full-screen preview of a sales invoice.
Creating a sales invoice
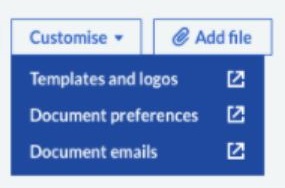
If you are creating a sales invoice, you can use the Customise menu at the bottom of the New Sales Invoice page to jump to customisation settings. This saves you time when trying to customise invoices for your business. You can also preview it by selecting Preview document from the New Sales Invoice page. See Create sales invoice - detailed version for more information.
Solution Properties
- Solution ID
- 222001000100457
- Last Modified Date
- Wed Nov 29 10:31:09 UTC 2023
- Views
- 0