Report Designer - Group properties and formatting
Description
Cause
Resolution

When you add groups to your Sage Accounts reports and other documents, you can set properties to control how the group appears and behaves.

If any of the panes mentioned in this article are not visible, on the menu bar click View, then click the required pane. If the pane doesn't appear, you can reset the Report Designer view to its default.

Modify group properties

  1. In Report Designer, in the Report Explorer pane click the group header or footer you want to change.
  2. In the Properties pane make the required changes as follows.

Align To Bottom (Footer section only)

To align the contents of the footer to the bottom of the page, select True. This option leaves the space required for the footer at the bottom of each page, but only prints the footer at the end of the group or report.

Allow Overlap (Footer section only)

Allows the section selected to overlap onto any following sections.

Character Count (Header section only)

To perform the group on the 'n' characters of the data, where 'n' is the value entered in the Character Count box.

For example, if the report is grouped by account reference, and the following account references exist in the data:

Jones
Joney
Jonne

When Character Count is selected and the Character Count is set to four, the fields are grouped as follows:

Jones and Joney are classed together as one group as the first four characters are the same.
Jonne is grouped individually as its four characters are different.

You can only group on the beginning of a field.

Enter the number of characters that the Report Designer Group Character Count function should check, to verify if a change has occurred that starts a new group.

Filter

To add a section filter, click Filter > click the finder button . The Expression Editor appears and you can build your filter.

Group Expression (Header section only)

This shows the variable or expression being grouped. To change the group, click the Group Expression > Browse. The Expression Editor appears. You must remove the original group then create the new group.

Group Sort Direction (Header section only)

This shows the order in which the group is sorted. Choose either Ascending or Descending.

A group sort takes priority over other sorts on the report. To view the other report sorts, open the Data menu and choose Sorts.

Height

Shows the height for the current section. To change the height, click Height box > enter the height you require.

Keep Together (Header section only)

To keep all items within this group together on the same page of the report, select True. The following rules then apply:

If two or more groups fit on to the same page of the report, they are kept together.
If a second or subsequent group cannot fit within the same page, it starts on a new page.
If a group is larger than one page, it starts on a new page then continues the group on a second page.

Page Break Before (Header section only) / Page Break After (Footer section only)

To keep each group on a separate page choose True. To have more than one group on each page choose False.

Page Break Only When Filter Met (Footer section only)

When using section filter, if this option is set to True, a page break occurs when the section filter is met. If it is set to False, the page break occurs for each instance of the footer section, even when the section is hidden from the report by the section filter.

Print On First Copy Only

When printing more than one copy of the document, if you want the header or footer to print on the first copy only choose True. If you want the header or footer to print on every copy, choose False.

Repeat on each page (Header section only)

This option controls how the section appears when information within a group runs across more than one page.

To show the group header section at the start of the group and also at the start of each new page within the group, choose True. You can use this to show column headings at the start of each page when a group runs across more than one page

To show the group header section only at the start of the group, choose False.

Start On Page (Header section only)

When the page break option is in use so each new group starts on a new page, to determine if each group starts on the next page, the next even page or the next odd page, choose the required option.

Suppress Printing

To prevent the group header or footer from printing, choose True or to allow the group header or footer to print, choose False.

Visible

To hide the section from the design view, preview and print set this to False. To leave the section visible set this to True.

TIP: You can reinstate invisible sections by selecting View, then Report Explorer.  You can select the section to view it's properties window.


Other formatting tips

You can use the following options to improve the appearance of grouped information:

Add text and variables to the group header

Any information added to the group header section of the report prints once for each set of grouped information. Any variables held in the Details section appear repeatedly for each piece of data returned.

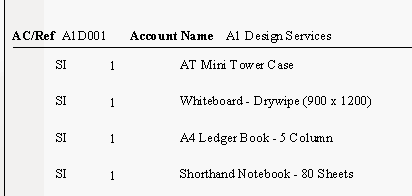
For example, if you add the SALES_LEDGER_ACCOUNT_REF and SALES_LEDGER.NAME variables to the group header section, along with their heading as follows:

Each customer's account reference and name appears only once for each group.

If SALES_LEDGER_ACCOUNT_REF and SALES_LEDGER.NAME are held in the Details section, for example, on a report listing customer's invoices, the customer's account number and name appears next to every invoice listed:

Add a subtotal to the group

You can subtotal the values for each group, and if required, have a grand total at the bottom of your report. To add subtotals to a group, copy the variable you want to total from the Details section and paste it into the group footer section. You can also add a text title to show what the figure relates to.

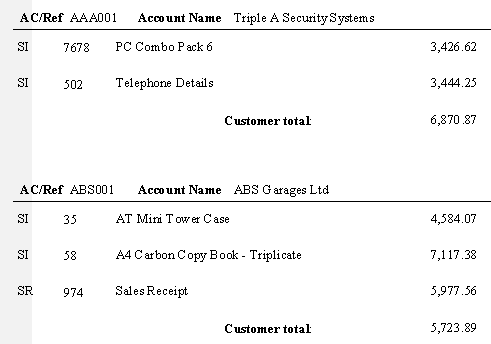
In the Properties pane, ensure the Function of the pasted variable is set to Sum. A subtotal is then displayed for each set of grouped information:


Divide each set of grouped information by a line or space

To divide each set of grouped information by a line, or hard rule, you can add a line to the group header section. To do this, from the Toolbox pane click Line, and on your report design, click and drag a line across your report, below any variables in the group header section.

The information appearing in the group header section, is then divided by a line on the report.
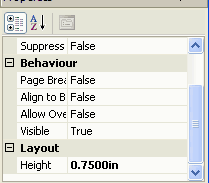
To divide each group of information by a line break or gap on the report, you can increase the height of the group footer. To do this, select the group footer, and from the Properties pane, increase the Height.
Your report then displays a gap between each group of information, for example:
If required, you can print each set of grouped information on a separate page by adding a page break. To do this, select the group footer and from the Properties pane, choose the Page Break After option as True.

Steps to duplicate
Related Solutions